clearout
  • Products
    • Email Verifier Verify emails addresses individually, in bulk or through API, with 99% accuracy
    • Email Finder Find individual or bulk emails by entering the person & company name or domain
    • Form Guard IconForm Guard Protect your forms from spam, bots, and invalid submissions with real-time email, phone, and name verification.
    • Prospect SQL/MQL list building with high levels of personalization, real-time data enrichment and prospect search
    • Clearout For SheetsVerify email addresses directly on Google Sheets with Clearout for sheets add-on
    • Prospect – LinkedIn Chrome ExtensionBuild verified, targeted prospect lists directly from LinkedIn profiles
    • ClearoutPhoneValidate phone numbers across 240+ countries in bulk, quick or real time validation
    • Free Tools
    • Disposable Email Checker
    • Reverse LinkedIn Profile Lookup Tool
    • Reverse Email Lookup Tool
    • Email List Cleaner
  • Resources
      DEVELOPERAPI iconAPI
      Clearout APIs are structured around REST and JSON
      Webhooks iconWebhooks
      Capture real-time events in your application workflow
      Form Guard iconForm Guard
      Real-time form validation to keep bad contacts out of your CRM
      KNOWLEDGE BASEGetting started iconGetting started
      Sending campaigns without bounces is made simple
      FAQ iconFAQ
      Easily find answers to services, security and common questions
      USE CASESLead Generation iconLead Generation
      Learn how professionals generate quality leads
      GUIDESPricing arrow iconTransparent & flexible pricing to support pay-per-use or recurringCompare Email Verification Tools arrow iconAI-powered email verification with 99%+ accuracy, real-time validation, and transparent risk scoringCompare Email Finder Tools arrow iconPre-verified B2B email addresses with confidence scoring, find real person email, not role-based addressBLOGSEmail Verification ToolsFind Anyone’s Email Address
      Most Accurate, Fast & Free Ways
      Form Validation
      Importance, Ways & Best Practices
      View All Blogs
  • Pricing
  • Integrations
  • Enterprise
  • Login
Try it free Book a 1-to-1 demo
Priyanshi Sharma / February 24, 2026 February 24, 2026

How to Implement Gmail & Yahoo Authentication (2026)


How to Implement Gmail & Yahoo Authentication (2026)

Gmail and Yahoo have now made the use of SPF, DKIM, and DMARC authentication compulsory to any person sending bulk mail. For bulk senders (5,000+ daily emails), authentication is mandatory.

To use Gmail and Yahoo authentication requirements in 2026, you are required to use 3 DNS records in your sending domain.

  • SPF to approve which servers can send mail for your domain.
  • DKIM to attach a cryptographic signature to each email.
  • DMARC with at least relaxed alignment to connect SPF and DKIM to your From address.

This guide walks you through the exact technical setup, how to create each DNS record inside your email platform, and much more details.

Table of Content


‣ What are the 2026 Gmail & Yahoo Authentication Requirements?
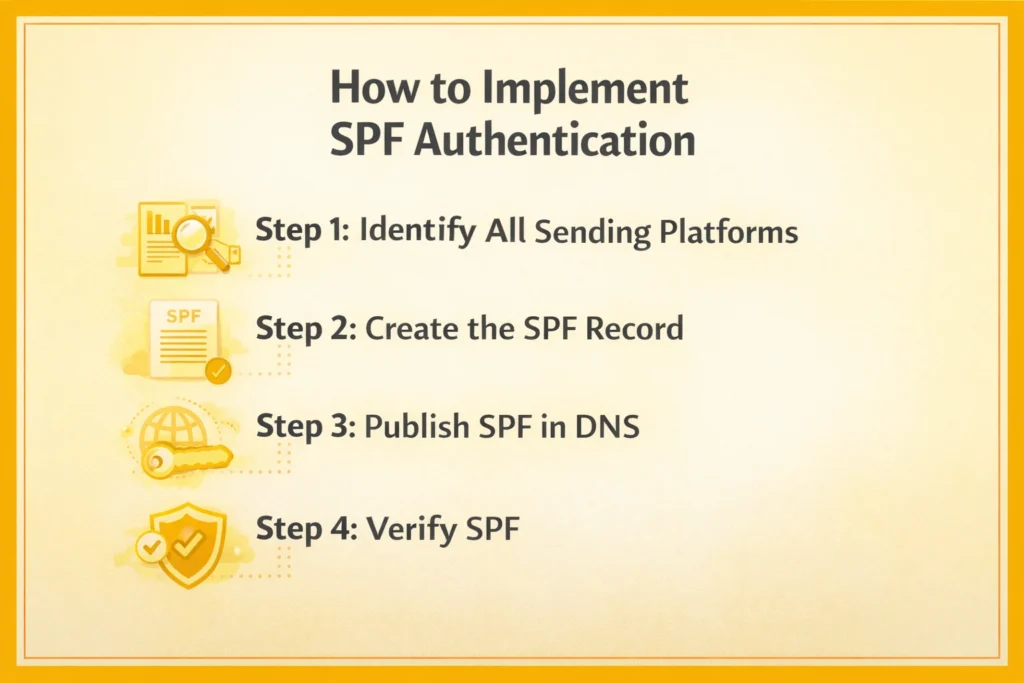
‣ How to Implement SPF Authentication?
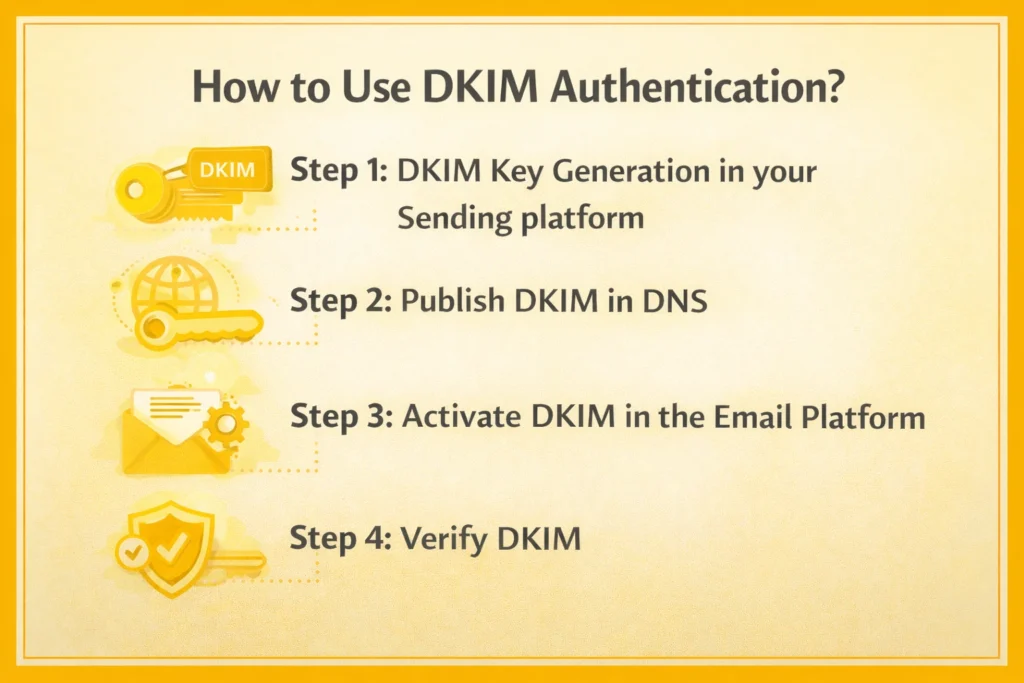
‣ How to Use DKIM Authentication?
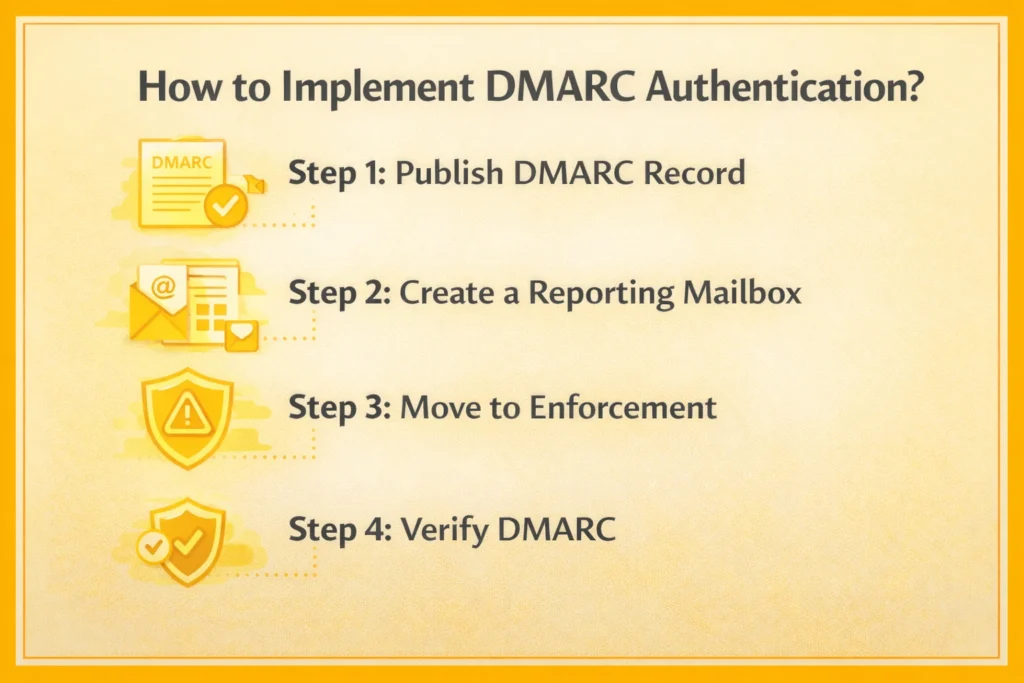
‣ How to Implement DMARC Authentication?
‣ One-Click Unsubscribe Configuration
‣ Spam Complaint Monitoring
‣ Common Implementation Errors
‣ How to Implement DKIM Authentication?
‣ Domain Alignment and Subdomain Strategy
‣ How to Monitor and Maintain Authentication?
‣ How to Troubleshoot Common Authentication Issues?
‣ Your Authentication Implementation Checklist
‣ FAQs

What are the 2026 Gmail & Yahoo Authentication Requirements?


An illustration showing 2026 Gmail & Yahoo Authentication Requirements.

You must first know the actual workings of each protocol before making any changes.

1. SPF, or Sender Policy Framework


It is an authorization list and informs the internet of which mail servers have the permission to send email under your domain name.

2. DKIM, or DomainKeys Identified Mail


It provides a digital signature to each mail that you send out. A private key is used to sign the message on your email platform. This corresponding public key is in your DNS.

Upon getting the email by Gmail, the public key is retrieved in DNS and the signature is verified. When the signature is a match, Gmail is confident that the message has not been changed and indeed the message was sent by a domain.

3. DMARC


DMARC instructs Gmail and Yahoo on what to do in the event of the failure of SPF or DKIM. It also verifies that the domain which is used in authentication is the same as the domain which people will view in the From email address.

How to Implement SPF Authentication?


Steps to implement SPF authentication.

Step 1: Identify All Sending Platforms


Name all the services emailing with your name:

  • Google Workspace and Microsoft 365.
  • Marketing platforms
  • Transactional email providers
  • CRM systems
  • Help desk software
  • Custom SMTP servers

Each platform provides an SPF include value in its documentation.

Step 2: Create the SPF Record


An SPF record follows this structure:

v=spf1 include:_spf.google.com include:sendgrid.net -all

Breakdown:

v=spf1 identifies SPF version include authorizes another domain’s mail servers -all instructs receivers to reject unauthorized senders
Multiple SPF records cause failure.

SPF has a lookup limit of 10 DNS queries. Each include counts toward this limit. If you exceed 10, SPF fails even if syntax is correct.

Step 3: Publish SPF in DNS


Log into your DNS provider.

Add a new TXT record:

  • Type: TXT
  • Host: @
  • Value: your full SPF string
  • TTL: 3600

Save the record.

Step 4: Verify SPF


Use:

nslookup -type=txt yourdomain.com

Or online SPF validation tools.

Then send a test email to Gmail.

Open the message.

Click Show Original.

Look for:

SPF: PASS

If it shows FAIL:

  • Check syntax
  • Confirm all sending sources are included
  • Verify there is only one SPF record

How to Use DKIM Authentication?


Steps to use DKIM authentication.

Step 1: DKIM Key Generation in your Sending platform


  • Log into your email provider.
  • Locate the DKIM section.
  • Generate a key pair.

You will receive:

  • A selector name
  • A public key value

The selector may look like: s1._domainkey

Step 2: Publish DKIM in DNS


Add a new TXT record.

  • Type: TXT
  • Host: selector._domainkey
  • Value: full DKIM public key
  • TTL: 3600

Example:

Host: s1._domainkey

Value: v=DKIM1; k=rsa; p=MIIBIjANBgkqhk...

Save the record.

Step 3: Activate DKIM in the Email Platform


Return to your sending platform.

Click Verify or Enable DKIM.

The system checks DNS for the public key. If detected, signing becomes active.

Step 4: Verify DKIM


Send a test email.

Open Show Original in Gmail.

Look for:

DKIM: PASS

If it fails:

  • Confirm selector matches DNS exactly
  • Confirm the key was pasted completely
  • Wait for DNS propagation

How to Implement DMARC Authentication?


Steps to implement DMARC authentication.

Step 1: Publish DMARC Record


Add a new TXT record.

  • Type: TXT
  • Host: _dmarc

Explanation:

p=none sets monitoring mode
rua specifies report email
adkim=r enables relaxed DKIM alignment
aspf=r enables relaxed SPF alignment

Start with p=none to monitor results.

Step 2: Create a Reporting Mailbox


Create: [email protected]

DMARC reports will be sent there in XML format.

Step 3: Move to Enforcement


After confirming consistent authentication passes, update policy.

Change to: p=quarantine

Later move to: p=reject

Reject instructs receivers to block unauthenticated messages completely.

Step 4: Verify DMARC


  • Send another test email.
  • Open Show Original.
  • Look for: DMARC: PASS
If DMARC fails:

  • Confirm SPF or DKIM aligns with From domain
  • Check subdomain configuration
  • Confirm alignment mode

One-Click Unsubscribe Configuration


Bulk senders must provide one-click unsubscribe.

Your email platform should automatically include:

  • List-Unsubscribe header
  • Test by checking email headers.

If missing, enable unsubscribe settings inside your sending tool.

Spam Complaint Monitoring


Use:

  • Google Postmaster Tools
  • Your email platform dashboard

High complaint rates trigger throttling even with proper authentication.

Common Implementation Errors


  • Creating multiple SPF records
  • Using p=reject before testing
  • DKIM selector mismatch
  • Forgetting to authenticate subdomains
  • Ignoring DNS propagation delay
  • Not checking Gmail headers
Each issue results in authentication failure.

How to Implement DKIM Authentication?


DKIM uses a key pair:

  • A private key stored inside your email platform
  • A public key published in your DNS

The sending system signs emails with the private key. Gmail and Yahoo read the public key from DNS and verify the signature.

Step 1: Generate DKIM Keys in Your Email Platform


You do not need to create DKIM keys manually in most cases as email platforms already have it.

Here is how to access DKIM on common platforms.

Google Workspace

  1. Log in to Google Admin Console
  2. Go to Apps
  3. Click Google Workspace
  4. Select Gmail
  5. Click Authenticate email
  6. Click Generate new record
  7. Choose your domain and select 2048-bit key length
  8. Google shows a TXT record to add in DNS

Microsoft 365

  1. Open the Microsoft 365 Defender portal
  2. Go to Email and collaboration
  3. Click Policies and rules
  4. Open Threat policies
  5. Select DKIM
  6. Choose your domain
  7. Click Create DKIM keys

Microsoft provides two CNAME records instead of TXT records. Copy both exactly.

SendGrid

  1. Log in to SendGrid
  2. Go to Settings
  3. Click Sender Authentication
  4. Select Authenticate Your Domain
  5. Follow the setup wizard

SendGrid provides multiple DNS records including DKIM.

Mailchimp

  1. Go to Account
  2. Click Settings
  3. Select Domains
  4. Click Add and Verify Domain

Mailchimp shows DKIM and SPF records to publish.

If you use a self-hosted mail server, you must generate keys manually using OpenDKIM or similar software. Most companies use platforms that generate keys automatically.

Step 2: Add DKIM Records to DNS


DKIM records use this format:

selector._domainkey.yourdomain.com

The selector is provided by your email platform. It might be:

  • google
  • s1
  • k1
  • selector1

Your DNS entry must match the selector exactly.

For Microsoft 365, you will add CNAME records instead:

  • Type: CNAME
  • Name: selector1._domainkey
  • Value: selector1-yourdomain-com._domainkey.yourtenant.onmicrosoft.com

Save all records exactly as provided.

Step 3: Enable DKIM Signing


After adding DNS records, return to your email platform.

Look for a button labeled Enable, Start authentication, or Verify.

Click it.

The platform checks DNS to confirm the record exists. Once verified, DKIM signing becomes active.

If verification fails:

  • Confirm the selector is correct
  • Confirm the record type matches the instructions
  • Wait for DNS propagation

Step 4: Verify DKIM Implementation


Send a test email to a Gmail account.

  • Open the message.
  • Click the three dots in the top right.
  • Select Show Original.

Look for this line:

DKIM: PASS

If it shows FAIL:

  • Check that the selector matches exactly
  • Confirm the key was copied fully
  • Confirm DKIM is enabled in the sending platform

Domain Alignment and Subdomain Strategy


The authentication usually fails because of the domain alignment errors, rather than the absence of DNS records.

What Is Domain Alignment?


DMARC requires that at least one of these two checks pass in the right way:

  • SPF
  • DKIM

If you send an email from [email protected], then SPF or DKIM must prove that yourcompany.com is truly the sender.

Subdomain Sending Strategy


Many companies separate sending types by subdomain.

Example structure:

  • example.com for employee mail
  • marketing.example.com for campaigns
  • mail.example.com for transactional messages

Each subdomain should have its own SPF and DKIM configuration.

DMARC policy can exist at the root domain example.com and apply to subdomains unless overridden.

Recommended structure:

  • Publish DMARC at example.com
  • Use relaxed alignment
  • Authenticate each sending subdomain individually

This structure allows the separation of sending streams while maintaining DMARC compliance.

How to Monitor and Maintain Authentication?


Steps for monitoring and maintaining authentication.

DNS records can break. Sending platforms can change configuration. New systems can be added without updating SPF.

1. Review DMARC Reports


If you configured runs in your DMARC record, you receive daily XML reports.

These reports show:

  • Which IP addresses sent mail using your domain
  • SPF pass and fail counts
  • DKIM pass and fail counts
  • DMARC pass and fail rates

Review reports weekly.

Look for unknown sending sources. These may indicate spoofing or misconfigured systems.

2. Monitor Complaint Rates


Monitor in:

  • Google Postmaster Tools
  • Your email platform analytics

If complaint rate rises:

  • Review list acquisition
  • Reduce sending frequency
  • Remove inactive recipients
  • Confirm unsubscribe link is visible and working

High spam complaints damage sender reputation even if authentication passes.

3. Maintain List Hygiene with Clearout


Invalid addresses increase bounce rates. Bounce rates above 5% indicate list quality problems.

Regularly:

  • Remove invalid addresses
  • Remove inactive subscribers
  • Validate new signups before sending

Authentication and email validation with Clearout work together in a great way.

4. Set Up Monitoring Alerts


Use monitoring tools to detect problems early.

Examples:

  • Google Postmaster Tools
  • Inbox placement testing tool
  • Spam filter testing services

Send test campaigns to internal seed accounts before large sends.

How to Troubleshoot Common Authentication Issues?


1. SPF Failing


If SPF shows FAIL in Gmail headers:

Check SPF record using:

nslookup -type=txt yourdomain.com

Common causes:

  • Too many includes exceeding 10 lookup limit
  • Missing sending platform in SPF record
  • Multiple SPF records published
  • Sending from subdomain without its own SPF

Fix by consolidating into one SPF record and including all valid senders.

2. DKIM Failing


If DKIM shows FAIL:

Check selector from email headers.

Query DNS for that selector.

Common causes:

  • Selector mismatch
  • Public key pasted incorrectly
  • DKIM not enabled in sending platform
  • DNS propagation delay

Correct the selector and verify key matches exactly.

3. DMARC Failing


Check alignment. If using strict alignment, switch to relaxed:

  • aspf=r
  • adkim=r

If neither SPF nor DKIM pass, DMARC automatically fails.

Fix SPF or DKIM first.

4. Emails Going to Spam Despite Authentication


  • Check the complaint rate.
  • Check bounce rate.
  • Review content quality.
  • Check engagement levels.

Authentication verifies identity. It does not guarantee inbox placement.

Your Authentication Implementation Checklist


SPF

  • Identify all sending sources
  • Create single SPF record
  • Stay under 10 DNS lookups
  • Publish TXT record
  • Confirm SPF PASS

DKIM

  • Generate keys in sending platform
  • Publish public key in DNS
  • Enable DKIM signing
  • Confirm DKIM PASS

DMARC
  • Publish DMARC record
  • Start with p=none
  • Confirm alignment
  • Review reports

You can use these authentication methods and still face email deliverability problems.

Before you import or send any campaign, use Clearout to:

  • Validate your email list
  • Remove invalid and risky addresses
  • Clean duplicates
  • Check for disposable emails

Want to improve your email deliverability?


Validate Your Email List

FAQs


1. What are Gmail and Yahoo's email authentication requirements in 2026?
When you send 5,000 or more emails each day to the users of Gmail or Yahoo, you will have to establish three protocols which are: SPF, DKIM and DMARC. You should also endorse a single click, unsubscribe, and maintain less than 0.3% spam complaints. Without any one of these it is possible that your emails will get rejected.
2. Can I send bulk emails without DMARC?
No. DMARC is required in case you are sending at least 5,000 emails per day to Gmail or Yahoo users. You are required to post a DMARC record in your DNS. The absence of DMARC will make bulk emails rejected or filtered intensively.

Share this article

Recent Posts

24 Feb 2026
How to Implement Gmail & Yahoo Authentication (2026)

Step-by-step guide to implementing Gmail and Yahoo authentication requirements in 2026. Explore how ...

18 Feb 2026
Why Your Emails Hit Gmail's Promotions Tab (and How to Fix It)

Explore why emails land in Gmail’s Promotions tab and how to fix it. Learn proven tips to move emai ...

16 Feb 2026
WPForms Spam Protection: Features, Limitations & Alternatives

Explore how WPForms spam protection works, its limitations, and the best way to prevent fake, dispos ...

13 Feb 2026
Top 5 Findymail Alternatives Compared in 2026

Explore the best Findymail alternatives in 2026. Compare the features, pricing, reviews, and why Cle ...

12 Feb 2026
How Long Should a Cold Email Be? (2026 Guide)

How long should a cold email be in 2026? Explore ideal cold email length for different roles, why sh ...

Clearout's

Form Guard

Validate email, phone & name on any forms!

  • Real signups only
  • Verified emails
  • Valid phone numbers
  • No fake names
  • Cleaner CRM
  • No devs needed
Try for Free Now

Email Verification, Email Finding Form Guard & Prospecting Service

Expand Your Reach By Finding & Verifying Ideal Prospects.

Sign up & get 100 free credits

No Credit Card required

Create Free Account
Company

Why Clearout?

Pricing

Contact Us

Careers

Press

Enterprise

Sitemap

FAQ

Status

Products

Email Verifier

Email Finder

Form Guard

Prospect

LinkedIn Email Finder

Reverse Lookup

Google Sheets Add-on

WordPress Plugin

ClearoutPhone

What's New?

Resources

Integrations

HubSpot

Team Account

API

Compare Email Verifier

Compare Email Finder

Compare Prospecting

Use Cases

Blog

Help

Legal

Privacy Policy

Terms

DPA

Security

Trust Center

Certification

ISO 27001/2022

SOC 2 Type 2

GDPR

Partnership

HubSpot Certified

Affiliates

Partners

Clearout for browser

⚡ Supercharge Your Prospect Research with Clearout's LinkedIn Chrome Extension - Find and Verify Emails with Confidence!

Clearout Chrome extension

clearout
© 2026 Clearout Inc. All Rights Reserved. Powered by Clearout.
Auto Credit Replenishment is here! Your credits can now recharge automatically. Learn More ➞
X